はじめに
この記事はUbuntuの基本的な操作やポートなどの設定(80と443)ができている前提です。
WordPressは多くの場合Apacheで構築されており情報もネット上に多く存在します。ただ、「どうしてもNginxで構築したい」なんて方などはご参考程度にどうぞ。
構成
今回は以下の構成で行います。
- OS: Ubuntu 22.04
- Webサーバ: Nginx 1.18.0
- PHP: PHP 8.1
- DBサーバ: MariaDB 10.6.12
- WordPress: 6.4.2
1. 準備
準備としてUbuntuに最初からインストールされている、Apacheをアンインストールします。
sudo apt remove apache2 -y
sudo apt purge apache2 -y
上記のコマンドを実行し、準備は完了です。
2. Nginxのインストールと設定
さて、今回の主役となるNginxをインストールします。
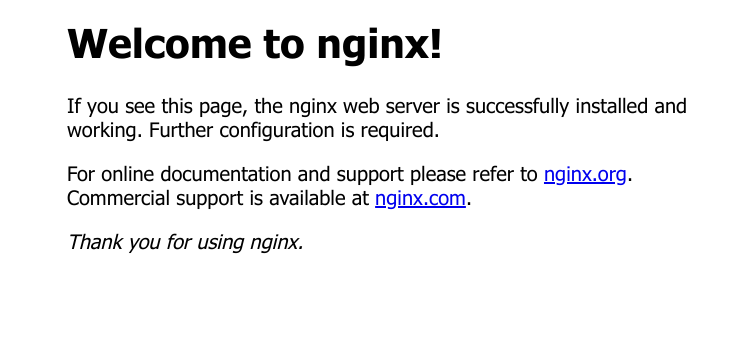
sudo apt install nginx -y上記のコマンドを実行し、インストールは完了です。ブラウザからアクセスし下のような画面になることを確認してください。

次にNginxの設定を行います。
sudo vim /etc/nginx/sites-enabled/default上記のコマンドでファイルを開きます。テキストエディターは好きなものをお使いください。(本記事ではVimを使用します。)
server {
        listen 80 default_server;
        listen [::]:80 default_server;

    client_max_body_size 16M;

        # SSL configuration
        #
        # listen 443 ssl default_server;
        # listen [::]:443 ssl default_server;
        #
        # Note: You should disable gzip for SSL traffic.
        # See: https://bugs.debian.org/773332
        #
        # Read up on ssl_ciphers to ensure a secure configuration.
        # See: https://bugs.debian.org/765782
        #
        # Self signed certs generated by the ssl-cert package
        # Don't use them in a production server!
        #
        # include snippets/snakeoil.conf;

        root /var/www/html;

        # Add index.php to the list if you are using PHP
        index index.html index.htm index.nginx-debian.html;

        server_name _;

        location / {
                # First attempt to serve request as file, then
                # as directory, then fall back to displaying a 404
                try_files $uri $uri/ =404;
        }
} 上記のようにsever{}にclient_max_body_size 16M;を追加します。(上記のファイルは一部省略しております。)
下記のコマンドでNginxを再読み込みします。
sudo nginx -s reload3. PHPのインストールと設定
WordPressを動かすのに必要なPHPをインストールします。
sudo apt install php -yphp -v一応バージョンが8.1であることを確認してください。(Ubuntu22.04はデフォルトで8.1がインストールされるはずです。)
sudo apt install php-fpm php-mbstring php-mysql php-curl php-dom php-imagick php-xml php-zip -yWordPressに必要なモジュールや推奨のモジュールを上記のコマンドでインストールします。
次に設定を行います。
sudo vim /etc/php/8.1/fpm/php.iniファイルを開き下記の項目を探し、書き換えてください。このファイルは2000行ほどあり、項目を探すのは少々大変です。
memory_limit = 256M
post_max_size = 16M
upload_max_filesize = 16M
これが完了したらNginxの設定ファイルをもう一度開きます。
sudo vim /etc/nginx/sites-enabled/defaultserver {
listen 80 default_server;
listen [::]:80 default_server;
client_max_body_size 16M;
# SSL configuration
#
# listen 443 ssl default_server;
# listen [::]:443 ssl default_server;
#
# Note: You should disable gzip for SSL traffic.
# See: https://bugs.debian.org/773332
#
# Read up on ssl_ciphers to ensure a secure configuration.
# See: https://bugs.debian.org/765782
#
# Self signed certs generated by the ssl-cert package
# Don't use them in a production server!
#
# include snippets/snakeoil.conf;
root /var/www/html/wordpress;
# Add index.php to the list if you are using PHP
index index.html index.htm index.nginx-debian.html index.php;
server_name _;
location / {
# First attempt to serve request as file, then
# as directory, then fall back to displaying a 404
try_files $uri $uri/ =404;
}
location ~ .php$ {
include snippets/fastcgi-php.conf;
fastcgi_pass unix:/var/run/php/php8.1-fpm.sock;
}
}上記の太線部分を追加してください。その後Nginxを下記のコマンドでリロードします。
sudo nginx -s reload4. MariaDBのインストールと設定
今回はデータベースサーバにMariaDBを使用します。
sudo apt install mariadb-server -yMariaDBをインストールしたら初期設定を行います。
sudo mysql_secure_installation上記のコマンド実行したら、メッセージにそって設定します。初期パスワードはないのでそのままEnterをおしてください。完了したら下記のコマンドを実行してください。
sudo mysql -u root -p先ほど設定したパスワードを入力し、ログインします。下記のSQLを実行しますが、太字の部分は適宜変更してください。
CREATE USER 'user'@'%' IDENTIFIED BY 'password';
CREATE DATABASE wp CHARACTER SET UTF8 COLLATE UTF8_BIN;
GRANT ALL PRIVILEGES ON wp.* TO 'user'@'%';
quit;
上記のSQLを実行し、ユーザー、データベースを作成しユーザに権限を付与します。以上でデータベースの設定は終了です。
5. WordPressのインストールと設定
そのままWordPressをダウンロードしても良いのですが一応tmpディレクトリにダウンロードします。
cd /tmp
wget https://wordpress.org/latest.tar.gz
tar -xzvf latest.tar.gz
上記のコマンドを実行しWordPressをダウンロード、解凍します。その後データを移動します。ディレクトリの中身だけコピーしても良いのですが、今回はディレクトリごと移動します。
sudo mv wordpress /var/www/html/
sudo chown -R www-data:www-data /var/www/html/wordpress
上記のコマンドでファイルの移動と権限を付与します。
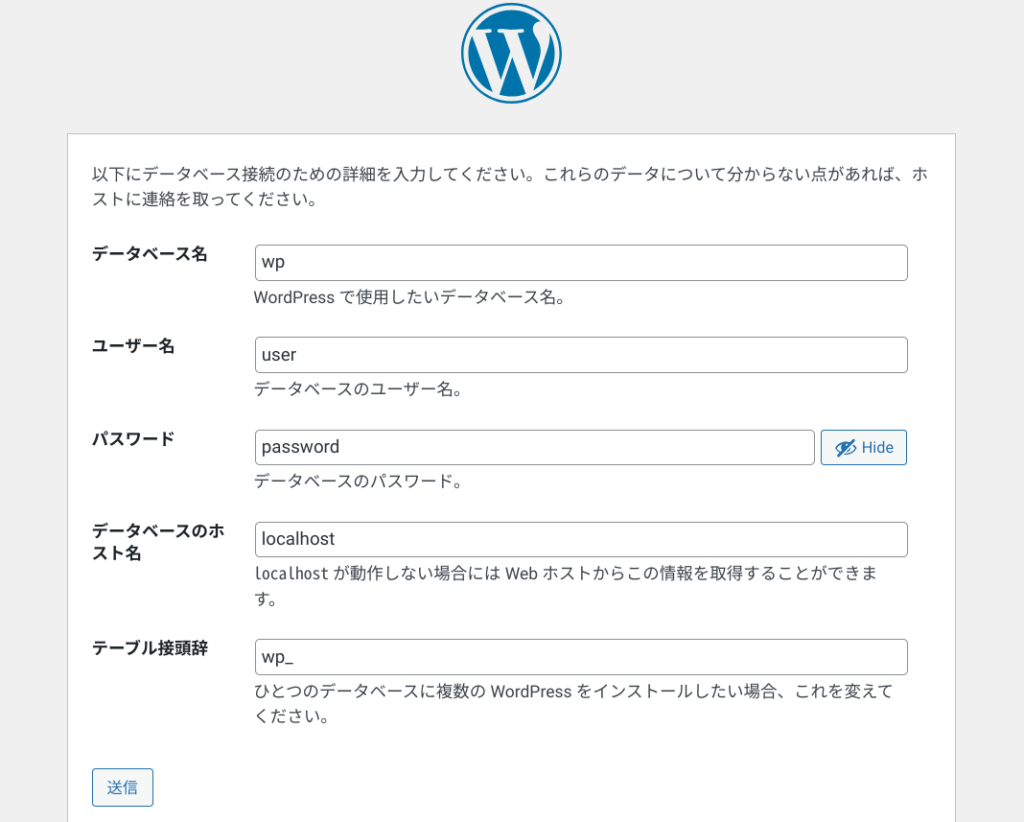
ここまで終わったら、サーバーにアクセスします。アクセスし「さあ始めましょう!」をクリックすると以下の画面になるかと思います。

こちらに4.で作成したデータベースの情報を入力し、送信します。(先程の通り作成した場合、上記のようになります。)
その後、言語選択などを行いインストールをします。その後ユーザー名とパスワードを作成し完了です。
おわりに
お疲れ様でした。正しく動作しない場合や間違いなどございましたらコメントでご連絡ください。詳細な情報も随時アップデート予定です。
最後まで読んでいただきありがとうございました。


コメント